The fly trap is not a submission that you see in every Brazilian Jiu Jitsu tournament such as regular triangles, armbars, rear naked chokes, etc.
The fly trap submission is a nrw submission created by Eddie Bravo’s black belt student Jeremiah Vance.
It’s not a secret that 10th Planet Jiu Jitsu players are very creative in their Jiu Jitsu game and rely extensively on flexibility especially in their rubber guard game.
What is the fly trap submission?
The fly trap submission is not an exception to the rule of flexibility and creativity of 10th Planet Jiu Jitsu players. It’s a triangle from the bottom side control that Jeremiah Vance worked on since he was a blue belt.
After he refined it throughout the years he started using it in big BJJ tournaments choking guys left and right.
The fly trap is very new in the BJJ scene, so players still don’t know what they are walking into until they find themselves laying on their back unconscious asking the ref what happened.
How to do a fly trap submission?
Prerequisite: Before trying the fly trap you should be flexible enough to do a normal rubber guard. Also, you must be familiar with the 10th Planet flow chart, Rubber guard, mission control, new york, etc.
In this step-by-step guide, we will assume that you are in bottom side control and your opponent is controlling you from the left side.
With that being said, let’s get to how to do a fly trap submission:
1. The fly trap starts from bottom side control
This does not mean that you should give up side control for the sole reason of submitting your opponent with a fly trap. If you are in a grappling match, giving up side control would cost you points or even being mounted and eventually getting submitted.
The consequences are even bigger if you give up side control in an MMA fight, you will be putting yourself in great danger of being attacked with ground and pound or getting mounted then attacked with punches and elbows and eventually falling into a submission.
The bottom line is, never give up side control, always stay in an advantageous position and don’t give anything up until you make sure that you will be able to counter.
2. Hip escape to your side
Once your opponent passes your guard don’t stay flat on your back facing the sky, adjust by hip escaping and turn on your side as if you want to give your back to your opponent. This adjustment will give you enough space for what’s coming up.
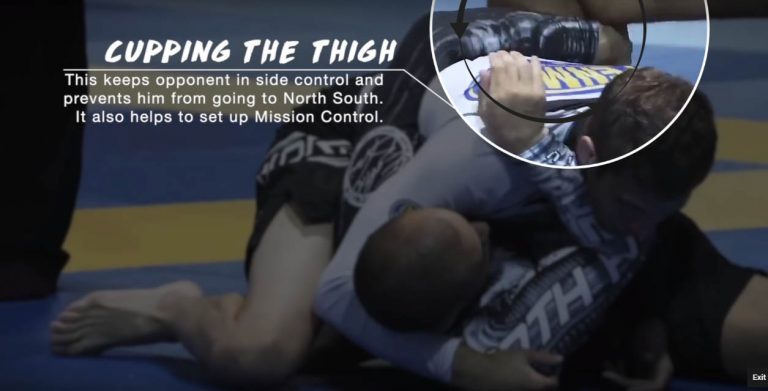
3. Cupping your hamstring
Once you face slightly away from your opponent, grab your hamstring. If your opponent has a left side control then you are going to have to grab on your left hamstring.
This move will prevent your opponent from posturing up and escaping the side control. It’s like a belt that you wrap around their back.
Also, this move prepares for the mission control move -If you don’t know what “mission control” is, keep reading until we hit that step and explain it-
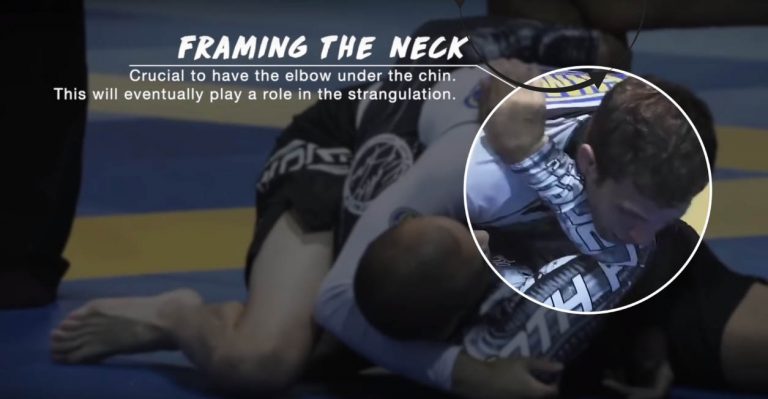
4. Framing the neck
Framing the neck is when you put your elbow against the neck. Your elbow should be under your opponent’s throat and you should be pressing against the side of their neck with the midsection of your forearm.
This move will prepare your opponent for the choke and will play a major role in the strangulation. Your elbow will help cut the blood flow in the right carotid artery of your opponent.
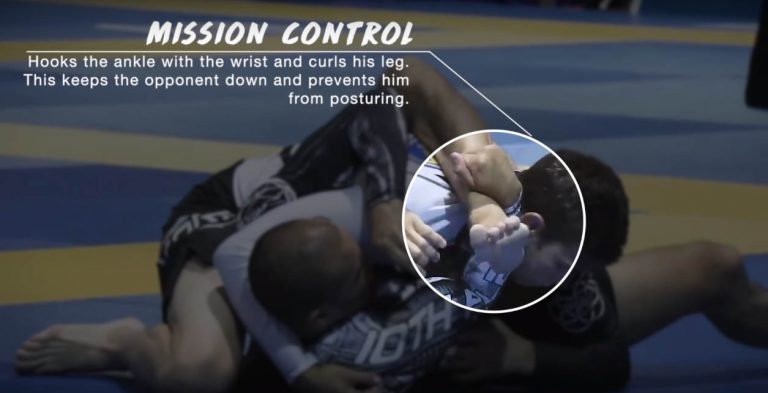
5. Mission control
Remember that left arm you used to grab on your hamstring? now release it and reach with the same hand towards your ankle and pull it towards your right arm which you are using to frame your opponent’s neck.
Now grab that left leg from the ankle with your right hand. This position is called mission control.
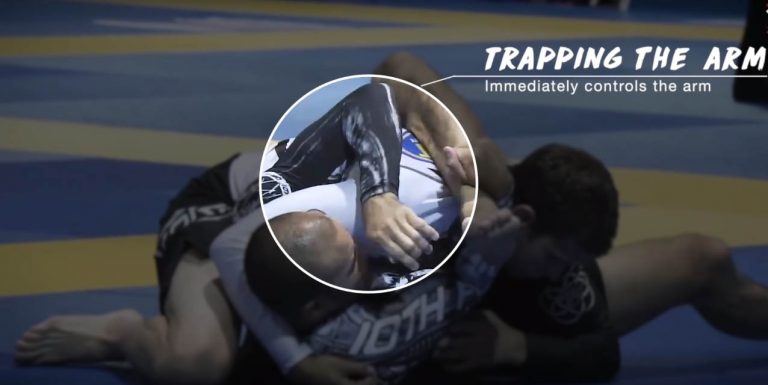
6. Trapping the arm
Remember that left hand you used at the beginning to grab on your hamstring? It’s free now, use it to trap your opponent’s arm.
When your opponent is having you in side control, the first thing they do is they wrap one arm under your neck.
In order to make the submission successful, you want to keep that arm in the same place wrapped around your neck. Trap it with your left arm by establishing an underhook.
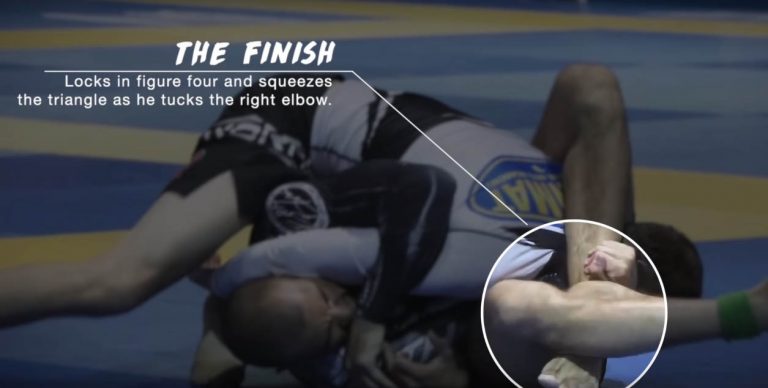
7. The finish
Now all the ingredients have been set up for the fly trap to succeed, it is time to wrap up the show!
In this whole process, we didn’t talk at all about your right leg. Why? Because it didn’t have any role yet. Now its role has come.
Your right leg will have two functions in this finish:
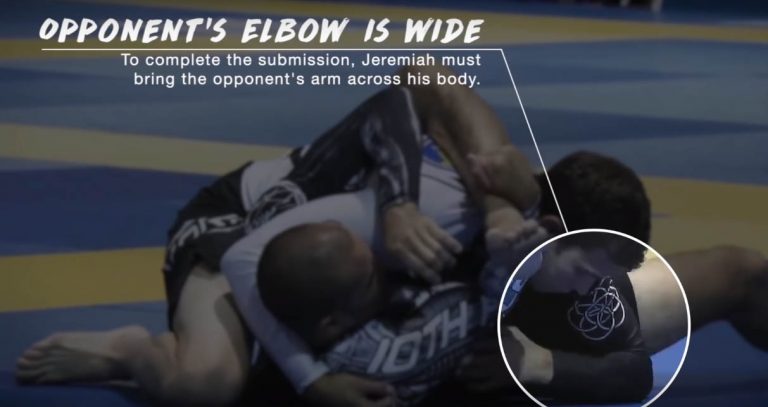
Your opponent is leaning on their left elbow and they are using it as a base to trap your body and stabilize you. You will have to kick hard upwards with your leg to push that elbow from being their base and take it out of the equation.
Its second and last role is to lock a figure four to choke the opponent
Once the figure four is established and the triangle is fully locked, it’s just a matter of time before your opponent taps or goes unconscious.
Important note: In order for this whole submission to work you have to be on your side, if you are flattened on your back you will have no room to work. So before locking your figure four make sure that you are fully adjusted, if not, use that right leg to adjust, it’ll help you to shrimp out and get on your side.
What is the mechanism of the choke?
The mechanism of this choke is that it cuts the blood flow using the opponent’s arm from one side and your elbow from the other side, both carotid arteries get attacked which results in a choke.