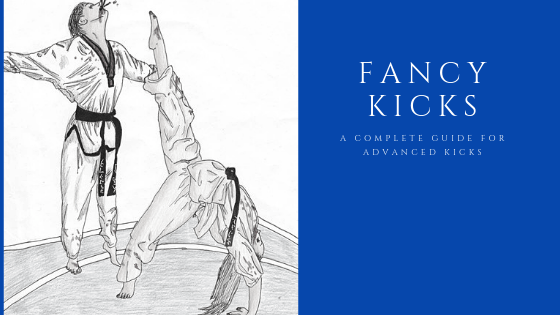
Fancy kicks? The ones which make your jaw drop before Joe Rogan’s mic drops. These kicks wow the spectators and leave your opponent reeling. A visual masterpiece straight from the cinematic universe capable enough of rolling the end credits for your opponent.
Remember, the Anthony Pettis Ninja Kick? revered as one of the most innovative kicks in an MMA bout? or the Bruce Lee flying kick? with its many renditions still captivating the minds of the audience. These were all out-of-the-box kicks as opposed to traditional kicks which generally keep you rooted to the ground.
쉬운 목차
Fancy kicks – The work of Art
Fancy kicks are fascinating kicks which imbibe heavy movements, especially with both feet in the air. We don’t see these kicks in combat very often. However, when we see them, they leave us astounded.
These kicks are part of every martial art form, from Taekwondo and Karate to Kung Fu and Wushu. Often criticized for showboating and lack of effectiveness, this blog will provide you with great insights and ample of reasons why the criticism of fancy kicks is unjust.
Basic elements in a fancy kick involve covering a certain distance, building a momentum, keeping both feet in the air at a certain point while delivering the kick. These are the factors that we are considering when talking about fancy kicks.
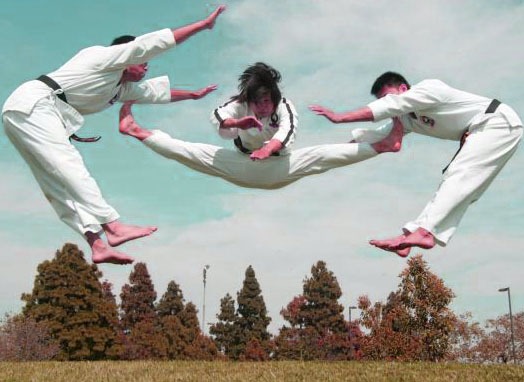
Scissor Kick
Scissor Kick a.k.a Split kick (not to be confused with the Muay Thai Scissor Kick) is amongst the most advanced kicks in martial arts which requires exceptional flexibility and dynamism. If flexibility is not on point, you might end up stretching your limbs and might have a hard time keeping up with your fitness.
Application of Scissor Kick
It is intended to hit two people at the same time. However, it is not used in a combat but rather for demonstration purposes or to test your kicking abilities. For instance, if you follow ITF Taekwondo then you have to learn this kick in 2nd or 3rd degree pattern which is called Ko-Dang. A scissor kick in martial arts is made up of a combination of twist kick and side kick. Thus, you need to know these two kicks before you practice scissor kick.
How to Scissor Kick?
Practice Straddle Position: A crucial part of a scissor or a split kick is a full stretch. To ensure you stretch to your maximum, try straddling. Simple place your leg, not too wide. Now if you’re right legged, turn your right foot in and your left foot out.
This way, your right foot will be in a position to deliver a side kick whereas your left leg will be used to deliver a twist kick. If you’re left legged, you do the opposite i.e. turn your right foot out and your left foot in.
Straddle into Stretch: Once you’re comfortable with the straddle position, start widening your legs and convert it into a proper stretch. However, you’ll maintain your leg movements as explained above. While stretching and holding this position, you’ll be working your groin, your thigh, and the entire leg. If you learn to hold your leg in this position, doing a scissor kick will be quite easier since the kick is only in this position for a second or less.
Run-up: As mentioned earlier a running or covering of distance is an important part in fancy kicks and scissor kick is not an exception. If you’re right legged, your last step before taking a flight will be with your left leg.
Building Upward Momentum: Regardless of the run-up you take, be it 2-3 steps, your last step should involve your left leg. Furthermore, the leg has to be in front of you to build the momentum. If the foot ends up being in line or behind, you’ll lose height which might lead to a miskick. The goal is to transfer the momentum upwards before we land the kick.
Driving right knee up: This is where we move towards the delivering stage. Herein, if you’re a right legged kicker, you lift your knee up and attempt a side kick. This movement will help you build towards the twist kick which is to be delivered from your other leg. With this movement, you have already figured the run-up and the jump side kick.
Following arms in a similar direction: Similar to your knees, you want to raise your arms in the upward direction to achieve maximum height before you’re about to land the kick.
Twist kick chamber: Having understood the first half of the scissor kick, let us move towards the second. This part requires us to use our left leg for twist kick. Chambering allows you to adjust the height and maintain the alignment. You want to be completely horizontal when you deliver this kick.
Extending leg for the twist kick: When attempting to scissor kick, use ball of the foot while doing the twist kick and blade or heel while doing a jumping side kick.
Visual Guide
Common mistakes to avoid when scissor kicking
Not warming up the leg muscles: An effective scissor kick demands flexibility. Thus, at a basic level, you need to get the stretching right. You simply cannot do without warming up your leg muscles and preparing them for a kick. If you’re not flexible enough, I’d suggest, you don’t try this kick as of now.
Not practicing side and twist kick first: A scissor kick is nothing but aerial side and twist kick combination. If you’re not well-versed with any of these kicks, your best bet would be to master these first.
The flaw in Momentum: When wanting to deliver a scissor kick, the momentum of your body should be in an upward direction. For this purpose, you should use your non-kicking left to help you with the elevation.
Avoiding the Twist kick chamber: Most common mistake while doing a scissor kick is lack of chambering. Yes, you’ve mastered the jumping side kick and you do know the basics of twist kick. However, if you do not chamber your leg before delivering a twist kick, you might not be able to achieve a proper horizontal stretch. This can result in side kick being higher and your twist kick being lower.
Not hitting the kick with the heel: As mentioned earlier, you must use, the right part of your foot to deliver each of these kicks. Practitioners often make the mistake of hitting both the kicks with the ball of the foot or the blade which renders the entire effort ineffective. Remember, your side kick should be delivered with the blade or heel whereas your twist kick should be delivered with the ball of your foot.
Countering a Scissor Kick
Since a scissor kick is unlikely to happen in a 1v1 scenario, you can still learn to counter if you or your partner are in a self-defense state during a street fight.
Covering up the distance: As soon as you see your opponent trying to maintain a distance and is about to take a leap, you can quickly cover up the distance and thwart their progress. Usually, a scissor kick requires you to take two steps at minimum before delivering the kick. Thus, if you manage to close the gap quickly, you’ll leave no room for your opponent to deliver the kick.
Using quick movements to distract or derail: Scissor kick requires flexibility at its finest. A person attempting the kick usually assumes that two targets are stationary. However, in a real-life situation, by quick movements, you can either deflect or cause your opponent to lose his/her balance.
Grabbing hold of the leg while it’s elevating: An unconventional method during a street fight would be to grab hold of your opponent’s leg before he elevates his kick and hits it. In the image shown below, you can see that the practitioner is not in full flight yet, thus if you catch the twist kick foot mid-air, you can actually take your opponent to the ground.
Drills to improve your Scissor Kick:
Sr. No
Drills
1
Practice your Side Kick to a good standard with the help of a target
2
Practice your Twist Kick to a good standard
3
Practice spacing your legs in a straddle
4
Try to achieve full splits
5
Try holding your splits for a longer period
Butterfly Kick
When you look at butterfly kick the first time; it certainly gives you a ballerina feel. Butterfly kick or the B kick is quite deceptive and insanely effective when executed with the right momentum. Before trying the butterfly kick, it’s crucial to develop a good range of dynamic flexibility. Especially when it comes to kicking backward. To deliver a butterfly kick, the set-up matters the most. Setup will help you to achieve enough momentum required to complete the move.
Application of the butterfly kick
Butterfly kick is simply an extravaganza for the onlookers. Its appearance in combat sports is rare. It is generally used to achieve more height and deliver a devastating blow to the opponents who are taller than you. The movements along with the added momentum make the butterfly kick really dangerous.
How to Butterfly Kick?
The basics of the butterfly kick involves understanding your leg movements. If you’re right legged, you’ll use that leg to kick whereas you’ll use the left leg to lift yourself and vice-versa.
Take a step forward: The butterfly kick starts with taking a move forward. Regardless of the leg, you want to use to kick, you are required to take a step forward. Let’s assume you’re using the left leg to avoid any kind of confusion.
Pivot: If you use your left leg to step forward, your right leg will come around. Herein, you pivot on your left leg and let the right one come forward. This movement will turn your body to the side and will enable you to bring your left leg around and kick it back straight.
Keep the chest parallel to the ground: While executing a butterfly kick, you must ensure a low posture, perhaps a dip with your chest parallel to the ground. This will help you transfer the momentum towards the other leg just as you’re about to take off.
Using arms to add momentum: Using the arms in a similar direction will help you add momentum. Similar to the scissor kick, arms do play a crucial role with regards to momentum.
Following up: After taking off from the ground and hitting with one leg, you want to ensure you follow up with the trailing leg as well. Following up allows you to capitalize on your stunned opponent and probably help you knock him/her out.
Landing: Once you’ve delivered the kick, you want to land perfectly so to handle the impact. For a perfect landing, you must land on the ball of the foot of the first kicking leg foot. The other leg will continue to turn your body before you land.
Common mistakes to avoid when butterfly kicking
Attempting shortcuts: The most common mistake made by even the advance practitioners involves the movement and pivoting. When wanting to deliver a perfect butterfly kick, you want to pivot to bring the other leg around. It’s merely impossible to do a butterfly kick without the pivoting, however, most of the practitioners, tend to cut short the movement and deliver the kick from a static stance.
Kicking against the momentum: Your low body posture and the usage of arms allows you to add momentum while delivering the kick. If your arms are running in the opposite direction, it will work against the momentum which will make the kick ineffective.
Not following up with the trailing leg: Butterfly kick emphasizes on kicking with both the foot, which implies kicking with both your leading and your trailing leg. If you connect with your leading leg and do not follow it up with a trailing leg, it won’t even count as a butterfly kick.
Misjudging the timing: If you misjudge the timing of your kick, you might end up kicking either too low, too high or miss the cue completely. Thus, it’s crucial to get the timing right. You can do so by practicing with the help of support, so you know the movement of your legs. Furthermore, you can even record your movements to track effectiveness and progress.
Improper landing through absorption of impact: The movement in a butterfly kick is too much and so is the impact. You don’t want to land straight as it might have an adverse effect on your landing foot. In order to absorb the impact, ensure you land onto the ball of your foot followed by a complete body movement.
Countering a Butterfly Kick
Unlike Scissor kick, your opponent might actively use a butterfly kick in combat. To counter a butterfly kick, you must know about its mechanisms.
Target the extensive movement: Butterfly kick by no stature of imagination is a quick kick. It involves a lot of movement and leaves the body open. If you’re quick to react. You can simply catch up your opponent with a straight kick to his/her ribs thereby knocking them out.
Ducking down or Stepping back: Though an unconventional block, butterfly kick is known to have a great height. If your reflexes are top notch, you can simply avoid the kick by ducking down. Apart from ducking down, you can even take a step backward to render the effort ineffective.
Side Kick: When you see your opponent lining up a butterfly kick, you can simply catch him with a side kick. Herein, your opponent’s entire body is exposed as he/she is looking to get the angle right. Before your opponent truly connects, you can deliver a venomous side kick and put an end to the bout.
Closing the gap: Since most of the flying or fancy kicks require a distance to operate from, you can easily counter by closing the opening. When you move towards your opponent, they have no space left to work with. Once, you’ve your opponent measured, you can either throw a punch, combination of punches of a knee to their ribs.
Drills to improve your Butterfly Kick
Sr. No
Drills
1
Improve your dynamic flexibility to a great extent
2
Try kicking backwards with the support of the wall
3
Place your hands-on waist level object for support and to understand the mechanism
4
Learn to kick upwards and not to the side
5
Work on the timings with your sparring partner
Tornado Kick
Tornado kick or 360 full turning kick is one of the most fascinating fancy kicks in martial arts. It’s widely popular in Taekwondo. Before you start with a tornado kick, make sure you’ve perfected the turning kick. The turning kick is the basic version of the tornado kick and by having considerable knowledge about the kick will help deliver a devastating Tornado kick.
Application of Tornado Kick
Tornado kick is not as rare the kicks mentioned above. It happens more frequently. The intent of the kick is to generate maximum force with the momentum and deliver a killer blow to the opponent. Heard about the effectiveness of turning kick? Imagine that with an added movement, increased momentum and velocity while connecting. It simply screams knockout.
How to Tornado Kick?
Get in the side stance: If you’re in a neutral stance, make sure you take the side stance. It just requires you to take an additional stance and get into the correct posture before you deliver the kick. While taking a side stance, ensure you’re at a considerable distance from the opponent.
Turn on the ball of the front foot: After you’ve taken the side stance, the primary movement involves turning your body with the help of the ball of your front foot. Followed by the movement, you turn your back towards your opponent and use your peripheral vision to keep tabs on your opponent.
Turn and lift the knee: Once you’ve your opponent set through your peripheral vision, turn back and lift your knee up at a 45-degree angle with the knees pointing towards your opponent.
Switch your legs: Once you have placed your knees at a 45-degree angle, switch your legs and land the kick with the trailing leg.
Kick through your opponent: Unlike turning lick, Tornado kick is a full turning kick, thus, you want to kick through your opponent and follow it up without stopping and getting back in the stance. You want to follow the momentum and do a complete 360 turn after you’ve landed the kick. It’s the intention of full round kick that helps to generate maximum impact.
Using your legs right: An ideal tornado kick involves connecting to your opponent’s chin with an instep or a lower shin. Instep will help you cover more distance and will help land a terrible impact on your opponent. However, if you want to connect with the guard, it’s advisable to use the ball of your foot instead of instep or shin.
Landing: Once, you’ve kicked your opponent, you want to make sure that the landing is subtle. The landing in Tornado kick is basically what we can describe as back to square one. If you do a Tornado kick, you’ll land in the same place you had started before.
Common mistakes to avoid when Tornado kicking
Not initiating the kick with a right stance: An effective 360 full turning kick or Tornado kick cannot be delivered unless you get into the side stance. It is the initiation point for this kicking technique. If you’re in a neutral stance, make sure to get into a side stance with a simple movement.
Maintain your distance while taking the stance: if not getting into a side stance is a common mistake then taking a stance too close to your opponent is a horrendous one. Your legs can easily be taken out if you do not operate from a certain distance. Remember, Tornado kick is a long-distance kick and thus you should maintain a considerable distance before landing the kick.
Not landing an effective blow: As mentioned above, it’s quintessential that you hit the right part of your opponent’s body with the right part of your foot. For instance, if you’re targeting the head, make sure you connect with the instep or your lower shin. Similarly, if you’re attacking the guard, connect with the ball of your foot.
Not kicking from a proper angle: To deliver an effective Tornado kick, you want to set your target beforehand and consequently work towards achieving the height and impact. Many practitioners make the silly mistake of not taking a proper angle before kicking. Do not do that, make sure your knees are at 45-degree angle before you switch.
Not following through: The major difference between 360 full turning kick and 360 turning kick is the movement. While you stop as soon as your land the kick in 360 turning kick, the 360 full turning kick requires you to rotate your entire body, that is the reason why it’s known as the Tornado kick.
Countering a Tornado Kick
One of the major drawbacks of Tornado kick is the distance. Given that your opponent is far away from you when wanting to deliver a tornado kick, you can counter them with a number of moves. These include:
Skipping axe kick: While your opponent is trying to cover a considerable distance, you can simply do the same. However, not with as much intensity as him/her. You just have to skip a step and as soon as he comes closer, land an axe kick. A skipping axe kick is often used as a counter to Tornado kick in Taekwondo sparring.
Skipping side kick: Similar to the axe kick, you can easily land a side kick as well. The ideology here is the same. Try cover a certain distance and meet your opponent in between to give him the taste of his own medicine. The skipping side kick is quite impactful as your opponent’s momentum in the tornado kick works against him.
Feinting Footwork: If you’re an advanced practitioner, you might have blocked a tornado kick with feinting already. If you master feinting, you can easily counter any kick and set up your own combination. In this case, a tornado kick is best met with a spinning hook kick or a roundhouse kick.
Skipping Roundhouse kick: As ideally demonstrated by Master TaekwonWoo, a skipping roundhouse kick can be a great counter to a tornado kick. The idea here is similar to all the skipping techniques. I urge you to watch this video to learn how effectively you can close the distance and counter with a unique move of your own. With thorough practice, it’ll be easy for you to catch your opponents in mid-air.
Drills to improve your Tornado Kick
Sr. No
Drills
1
Practice the basic turning kick till you perfect it before trying the Tornado Kick
2
Practice body rotation in sync with your arms
3
Emphasize on the kicking leg and measure its weight of effectiveness
4
Set up a target and try to hit the desired area
5
Improve your hip flexibility with static and dynamic exercise
540 Kick
360 turning kick or Tornado kick is a pre-requisite for a 540 kick. One shouldn’t try the 540 kick unless they have their body set on 360. Once you’ve mastered the 360 kick, implementation of the 540 kick will become much easier. However, if you skip the Tornado kick, you’ll probably end up injuring yourself. Moreover, this fancy kick does require a lot of flexibility similar to those kicks mentioned above.
Application of a 540 kick
540 kick is advanced martial art kick usually targeted towards the head of the opponent. While 360 kick can also be pulled off from a neutral stance while you’re relaxing, similar cannot be said for a 540 kick. Since this kick requires you to land at a certain angle, its implementation has to be perfect. You simply cannot mess around without proper intention of landing the kick. Ineffectiveness may lead to a broken ankle or several other complications.
How to do a 540 Kick?
Turn on the ball of your foot: After having taken a side stance, you want to turn on the ball of your foot with your back facing your opponent. The setup of this kick is quite similar to the Tornado kick.
Shoulder and arm movements: Similar to the other fancy kicks, 540 kick requires an active usage of arms and shoulders to build momentum as well. Wind your arms, swing them with your body to gather momentum. This will allow you to exert more force before you lift your leg which later translates into the 540 kick you’ll land.
Lift your leg up: After setting up your peripheral vision, turn towards the front with your leg lifted up straight towards the front. Remember that your leg should be parallel to the ground. Furthermore, when you lift your leg up, your arms and shoulders should follow.
Chambering your leg: Chambering as you might have heard has numerous benefits when kicking. Even in 540 kick, chambering provides you with the base upon which your kicking leg can execute the kick. What makes a 540-kick unique is the significant role that chambering plays in the non-kicking leg.
Bend a little: When you’ve chambered your legs and are about to deliver the kick, just bend a little. This part is usually not seen in any other kicks generally. However, when you bend you enable your body to get a better elevation while launching the kick. Just before you’re about to hop, close your fold your arms for a faster turn.
Hop over your knees: Here’s where things get spicy. The final blow requires you to hop over your lifted leg. This is where the 540 angle comes into play as you’re required to land at that angle. Hopping your kicking leg over your knees can be daunting initially. If you’re just starting out with 540 kicks, you can gradually build it up.
Proper Landing: The final step in this technique involves tucking the hopping leg and landing on the flat or the ball of your foot. When you’re landing you want to rotate so that the entire impact doesn’t fall on your foot but is rather shared by your entire body majorly the hips.
Common mistakes to avoid when doing a 540 kick
Not practicing 360 kick: Hands down, the biggest mistake a practitioner makes is when he/she jumps straight to 540 without practicing 360. I’ve mentioned numerous times about how risky that can prove out to be. Thus, wrap your head around 360 first before you go to 540.
Not taking the extra steps: 540 is not the same as 360, it’s much more difficult. You cannot at any point be relaxed while delivering a 540. Especially when you’re covering the ground and taking those extra steps, make sure you’re building your momentum before landing the kick.
Turning completely: While kicking through is the aim of the 540 kick, you don’t want to end up making it a Tornado kick. Thus, you want to avoid turning completely and stop at a particular angle and quickly get back in the stance.
Underplaying the setup: Most of the practitioners who can execute a successful 540 kick will actually tell you that they converted a turning or a spinning hook kick into a 540. Don’t underestimate the role of these basic kicks. These can help you set up the 540 kick if you’re currently finding it difficult.
Not using arms to full effect: Not only should you use your hand to gather momentum but to add speed as well. Winding your arms will tremendously help in gathering the momentum whereas locking the arms close to your body will help you deliver the kick in full speed.
Countering a 540 Kick
While 540 is technically stronger than a tornado kick and that makes it more difficult to counter. Since the movement is quick, the opening to counter is not too much. However, similar strategies can be used to counter a 540 kick as we learned in a Tornado kick.
Spinning Hook Kick: Yet again, a great way to counterattack your opponent by closing in the distance really quick. The moment your sense that your opponent is cooking up a 540, you’ll have a one-second advantage since you don’t have to take an extra step for your kick. Not only is this an effective counter but also fatal.
Roundhouse kick: Definitely Taekwondo’s most beloved kick, the Roundhouse kick can be effectively thrown to only counter but to score the tremendous amount of points from a defensive stance. Yet again, space plays the crucial role, you want to capitalize on the distance by inviting your opponent then catching him up in between.
Skipping Side Kick: As your opponent is about to hop, you can simply catch him with a skipping side kick. Similar to a counter-attacking weapon in 360, a skipping side kick can be cleverly used to counter a 540 as well.
Body feinting: Feinting backward is the simplest yet the most Ludacris counter. Not only does it make a fool out of your opponent, but it also drains his energy. After you’ve avoided the attack, you can simply land your own combination. You can either take your opponent down or take lock them up in a clinch.
Drills to improve your 540 Kick
Sr. No
Drills
1
Practice 360 kick to great effect before moving onto the 540 kick
2
Practice landing on your kicking foot till you perfect it
3
Master Roundhouse kick and Inward Crescent Kick to great effect
4
Try achieving the angle with your knees in front as opposed to the 45-degree angle
5
Drive the knee up of the non-kicking leg to perfect the timing and coordination
720 Kick
How to do a 720 kick?
Get into the side stance: You must have noted a pattern in all these fancy kicks – all of them require you to take the side stance. The reason for that is because when you rotate, you are able to gauge the momentum in the right direction. If you’re in a neutral stance, simply switch into a side stance, when doing so, make sure you know which leg you’re going to use for the kick.
Swing your arms with your body: In order to generate more power, let your arms follow your body movement. These advanced kicks require your arms to be used to its full effect to add to the overall power and precision.
Turn on the ball of the front foot: This is technically the first step you take in this technique done simultaneously as you swing your arms. It requires you to turn on the ball of your front foot. Followed by bringing your knee to the front as seen in the other kicks.
Knee to the front: When you bring your knee to the front while rotating, ensure that it’s more than what you did in the tornado kick. Followed by that, simply launch yourself from the ground to achieve more height.
Keep your knee out till you complete the turn: While spinning keep your knee up and drive it across the whole time i.e. your knees will be in the air while you rotate and get back to the front. As you complete your turn, open your hips mid-air and let your knees out before you’re about the kick.
Knees wrapped around: While you’re rotating, your knees will be wrapped around each other, with your leading knee completing a full circle while your kicking knee is ready to be released from the chamber position.
Use the chamber position from the other leg: Having successfully completed the turn, it’s time for your kicking leg to launch the final blow from the chamber position.
Land on the ball of your foot: In order to minimize the impact, it’s always advisable to land on the ball of your foot.
720 kick isn’t a cakewalk and thus you shouldn’t jump on it without having practiced 360 and 540 kick. You can do a number of drills which you can learn from the comprehensive guide below to get started.
Common Mistakes to avoid when doing a 720 kick
Skipping 360 and 540: As said earlier, you cannot jump on a particular kick without practicing the one before it. If these fancy kicks can be judged by levels, the 720 kick is at level 3, 540 is level 2 and 360 is level 1 in the advanced kick category. Thus, without completing level 1 and 2, you shouldn’t even try the 720 kick.
Not utilizing the force of your arms while swinging: Many practitioners commit this mistake of not swinging their arms along with the body. This causes the force to deflect in the opposite direction thereby rendering the entire effort ineffective. It’s your hands that start the movement after you get into the side stance, thus don’t downplay their role.
Improper timing with regards to knee wrapping: Just at the center point in this technique, there’s a spot where your knees are wrapped around each other. Many practitioners often overlook this which causes them to miss the proper timing. The wrapping of knees takes place exactly at the center point when you’ve completed your turn. Wrapping your knees ensures maximum torque and force just as you’re about to land the kick.
Not emphasizing on chambering: It’s the chambering of legs which helps you to kick right. Chambering doesn’t just refer to a checkpoint but rather acts as a base for your kicking leg to deliver the final blow.
Not using the right part of the foot: Ideally, you should use the ball of your foot for maximum impact. However, as seen in other fancy kicks, you can choose different areas based upon your own iteration for the kick. You can even use your lower shin or instep but that’s unusual. In 720, it’s the ball of the foot that is most preferred.
Cheat 720 kick
Having talked about the 720 kick, we simply cannot skip the latest trend that is going around the martial arts world. If you’re synonymous with Raymond Daniels’s spectacular knockout at Bellator Birmingham, you already know what I’m talking about. Stemming from a recent trend of ‘Martial Arts tricking’ which has covered decent ground in the past two decades is a combination of martial arts and gymnastics.
A cheat 720 kick comprises of a spinning hook kick or a wheel kick and a tornado kick. Once, you have these two kicks mastered, cheat 720 kick, wouldn’t be a much of an issue for you.
Countering a 720 kick
Countering a 720 kick is perhaps the most difficult task you’re faced with in a fight. The movement is so quick that you cannot land an effective strike when your opponent is looking to taking your head off. However, stepping back is not something you can afford, as he/she might cheat it and land a killer blow. Thus, you have to counter during the transition to prevent your opponent from landing. It’s a risk as you do not know where your feet will land, but if your reflexes are on point, you might covert your opponent’s 720 effort into a knockout blow.
Sweeping the leg off: Perhaps your best chance of rattling your opponent. Simply sweep their standing leg. Just as he/she about to take off, there’s a tiny opening where your opponent is rolling on the ball of his/her foot. This presents you with an opportunity to sweep the knees and make your opponent land hard on their back. Doing so might prevent you with a counter-initiative or might directly result in a knockout due to impact. However, since, the kick is a long distance one, make sure you skip forward before sweeping.
Sweeping the leg off: Perhaps your best chance of rattling your opponent. Simply sweep their standing leg. Just as he/she about to take off, there’s a tiny opening where your opponent is rolling on the ball of his/her foot. This presents you with an opportunity to sweep the knees and make your opponent land hard on their back. Doing so might prevent you with a counter-initiative or might directly result in a knockout due to impact. However, since, the kick is a long distance one, make sure you skip forward before sweeping.
Jump side kick: This is a dangerous attacking counter. Just as your opponent is in the air, you launch a counter from your locker where you skip a step to close the distance and land a jump side kick to target the guard or the head of your opponent. Remember, 720 motion does require a little time and if you can sense the kick coming your way, you can simply close the distance and land a fatal blow.
Ducking down: A defensive counter to protect yourself would be duck down from the kick. Similar to the 540, ducking down is more effective as the peripheral vision of your opponent is not completely on point. Thus, you can use this to your advantage.
Any skipping kick: As explained in detail in the counter above, you can use any skipping kick – roundhouse, axe or hook to cover the distance and land the kick. The trick here is to read your opponent’s intention and deliver the shot before your opponent lands his/her 720.
Be ready for a cheat 720: Honestly, practitioners love cheat 720 more than the actual kick itself, in such a case, you should be ready if your opponent cheat’s a 720. Remember the moment he lands on his feet; you want to knock his/her teeth off with a crunching punch or vicious kick to the head.
Drills to improve your 720 Kick
Sr. No
Drills
1
Perfect the tornado kick, 540 kick, and Pop 540 round kick before moving to 720 kick
2
Turn on the ball of your foot and hop around on one leg. Try holding this position.
3
Try jumping and turning with your knees close to each other. Combine spin with a jump
4
Once you perfect 360-degree motion, try doing the same but aim for 720 now
5
Try standing rotating and balancing yourself on one leg – 360 and 720 motion
Butterfly Twist Kick
Take the Butterfly twist kick to be an advanced iteration of the standard butterfly or B kick. The steps involved in the butterfly twist kick are similar to the B kick, but they require more height. If butterfly kick feels like watching a ballerina, imagine what a twisting butterfly would feel like? Exceptionally pleasing to the eyes. Yes, I thought the same.
Application of a butterfly twist kick
Butterfly twist kick is hard to master. Thus, you should try certain drills before you start off with a butterfly twist kick. These drills involve trying a 360-degree spin vertically, followed by lifting both your legs up with hand support to increase the power and preparing your body for a horizontal movement. Lastly, emphasize on the spin using a mat, herein, you practice the spin by falling onto the mat to understand the mechanism.
How to Butterfly Twist Kick?
Take a step forward: You take a step forward, turn around as you do in a normal butterfly kick. Must pivot on your front leg as soon as you take the step and turn around.
Turn around: Just as the butterfly kick, you should turn around with your back facing your opponent. In this stage, your peripheral vision is quite important as you can track what your opponent’s up to.
Take off: While you are about to elevate, make sure you try to lift your leg up and not straight. Try to lift your leg as high as you can while combining it with the take-off to achieve more height.
Turn your head: It’s imperative that your first horizontal turn will be followed up with your head facing your opponent. Mark this as a checkpoint notifying that you’ve reached the midway point of this move.
Pull your arms in the twisting direction: As you turn your head, pull your arms in the twisting direction to initiate the twist. While doing so, your base leg will lift up and will wrap around the other leg. This will help in twisting the hips thereby allowing the spin.
Keep your leg closer: When you’re in the twisting motion, try to keep your leg as close as possible. Try to keep them horizontal to the ground before they spin towards your opponent.
Landing: For an accurate landing, you want to open your arms and reach to the ground using the same leg you took off from. Your kicking leg can then follow it after some time.
Common mistakes to avoid when doing a butterfly twist kick
Not kicking up before the twist: Just because it’s a twist kick, doesn’t mean you twist straight away. Thus, try kicking up before you twist to achieve height and greater force. Trying to twist early might be good for power but it is incorrect and isn’t visually appealing.
Spreading your legs wide while in the air: Most fighters emphasizing on the spin, tend to neglect the importance of leg movement. To gather momentum and land with sheer force, you want to keep your legs as close as possible. Do not spread your legs while twist, keep it close and tight, directly horizontal to the ground.
Missing the cue: Remember, the leg you take off with is the leg you should land with. If that doesn’t happen, you have completely missed the timing and thereby were unsuccessful in landing the kick. Practitioners practicing this kick for the first time might end up making the wrong landing. However, if you keep practicing, you can easily overcome this problem.
Not opening the arms: Many practitioners when starting out with the butterfly twist kick tend to keep the arm closed. Remember, just as you’re about to land, make sure you open the arms. If you do not, then there’s every chance that you might lose your footing and your balance. Also, if you don’t open your arms, you exert the entire pressure on your foot which is not advisable.
Not spinning at the right time: While practitioners try twisting before kicking up, they also commit the mistake of delaying the spin. If you get this step wrong, there’s a 90% chance that your entire effort would make no sense which will result in no impact and an awkward landing. Thus, ensure that you spin at the right time.
Countering a butterfly twist kick
Similar to the butterfly kick, the butterfly twist kick does open up your opponent. If you’re quick, you might use these openings to attack your opponent. Similar to the other moves mentioned above, countering a butterfly twist kick can be done in an attacking or a defensive manner.
An attacking manner would require you to launch a kick of your own whereas a defensive counter will require you to step back, step-aside or duck underneath.
As mentioned in the fancy kicks above, skipping kicks is the best bet to catch the opponent mid-air. You can use a skipping roundhouse kick, a skipping side kick, a skipping axe kick or a spinning hook kick to leave your opponent stranded. The countering elements are the same and thus, you can refer to the counters in the butterfly kicks as those can be used here too.
Drills to improve your Butterfly Twist Kick
Sr. No
Drills
1
Perform the U-Dip motion continuously
2
Try raising your back leg in a horizontal position and hold it in the air
3
Practice chambering and kicking when your legs in mid-air
4
Practice spinning without kicking. Understand the motion and mechanism behind it
5
Co-ordinate your front leg, back leg and jump with your hands in the air
Guyver kick
If you’ve watched Undisputed 2, you might be synonymous with the name ‘Boyka’, the man who popularized the Guyver kick in the popular culture. The name of the kick originates from a well-known movie called ‘The Guyver Dark Hero’. As opposed to the popular belief, the Guyver kick has been in the martial arts realm since a long time. Having discovered the roots, let’s move towards the application of the Guyver kick.
Application of the Guyver Kick
Guyver kick similar to the split kick requires you to use both your legs. To deliver a successful Guyver kick, you need to master the Jump Spinning Hook kick along with the twist kick. Guyver kick is an impactful kick and contrasting to other fancy kick, it doesn’t require quite a runup.
How to do a Guyver Kick?
Get into the stance: After you take the stance, you’ve to kick with both your legs. The first kick will be a jump spinning hook kick whereas the other will be a twist kick.
Driving up while taking off: The first step to delivering a successful guyver kick requires you to drive your body upwards when taking off. While doing so, dip your shoulders towards the leg you’re going to deliver the twist kick with.
Tilt body backward but hunch in: When you’re about the deliver the first kick i.e. the jump spinning hook kick, you must tilt your body backward whilst hunching forward. While you do so, your non-kicking knee should be turned out to prepare for the twist kick.
Quick follow up: As soon as you land the spinning hook kick, you quickly switch your attention to the twist kick with the other leg while your body tilts towards the same direction. This will help to add power and momentum to your kick as you’re about to fall.
Chambering: You must have already learned about the importance of chambering when you want to use multiple kicks. It’s the same thing here. You want to chamber your legs for a tiny second after you hand the jump spin hook kick and are about to land the twist kick.
Practice the fall: Firstly, don’t get shocked when I tell you that Guyver kick does require you to fall onto the ground. You can use a mat to practice falling after attempting the twist kick. You can practice twist kick while trying to fall on the supporting leg to master landing. Remember, landing is quite important and a wrong one can cause serious problems.
Landing Correctly: As you commit to the fall and are about to land, let your leg you kicked with first to connect with the floor. And then distribute the momentum to your palms, forearms and then your body. Do not catch the entire impact on your palms or hands, by walking them straight onto the floor, it might cause a devastating injury.
Common Mistakes to avoid while doing a Guyver kick
Not achieving enough elevation: Perhaps the most common and a silly mistake involves practitioners rushing into the kicks with low elevation. To deliver a successful Guyver Kick, you want to drive your body in the upward direction and achieve as much height as possible.
Not practicing the kicks separately: As mentioned earlier, Guyver kick is a blend of jump spin hook kick and a twist kick. Thus, you need to master the spin hook kick and twist kick separately. Many practitioners just try to follow the motion and do not emphasize on the mechanism behind the Guyver kick.
Not hunching forward: When you’re about to land your first kick i.e. the jump spin hook kick, you must hunch forward while your body is tilted backward. This helps in setting up for the twist kick as you’re about to lean your body towards it.
Getting one kick right: Most practitioners commit the common mistake of overemphasizing on one kick and undervaluing the other. A proper Guyver kick requires you to deliver the best of both kicks.
Incorrect landing: When you land, do not directly land your entire weight onto your hands. You’d want to transfer your weight from the palm of your hands to your entire body.
Countering a Guyver Kick
Guyver kick is technically avoided and its occurrence is rare. It leaves your vulnerable and thus if your opponent is attempting a Guyver kick, you have numerous opportunities to deliver a counter. You can either counter defensively or can choose to attack based upon your preference.
Defensive Counter: As we learned in the fancy kicks above, you can defend by simply ducking down or taking a step back. A defensive counter heavily relies on precision and there’s a small window where you have to get it right by hook or by crook.
Attacking Counter: Attacking counter requires a fierce approach and there a number of openings which you can target.
You can sweep the standing leg by ducking the twist kick
You can launch a roundhouse kick or a side kick as your opponent is hunching forward
You can turn a defensive fall back into an attacking counter as your opponent falls into the ground after a failed Guyver kick attempt
Skipping kicks yet again would work the best if you want to target the back or the guard of your opponent
Drills to improve your Guyver Kick
Sr. No
Drills
1
Practice jump spinning hook kick using your dominant leg
2
Try holding your leg straight with your knees of your supporting leg turned outwards
3
Focus on chambering for twist kick before you practice falling
4
Practice falling after the twist leg on the soft surface followed by harder surface
5
Try Jumping and rotating at the same time with an upward momentum
Helicopter Kick
A renowned kick in the popular culture thanks to Van Damme. It’s perhaps one of the most iconic kicks we’ve been treated with on our screens. The Van Damme helicopter kick is a different iteration of the 360-spinning kick (not to be confused with 360 kick above) or jump spinning hook/crescent kick.
Application of the Helicopter Kick
A helicopter kick is used to target the upper body or the head of an opponent. A major difference between Van Damme’s helicopter kick and a 360-spinning kick is that there’s a double bounce involved before the kick takes place. This is an underutilized kick due to the fear of telegraphing the kick which can be easily countered. However, the jump which is considered to be a weak point helps add tremendous height and momentum to the kick.
How to do a Helicopter Kick?
Prepare to jump: As said earlier, an extra jump is what makes this kick unique along with its motion. A simple jump helps you set off in a great way.
Get the body movement right: As you straighten your legs to jump, you want to turn your foot, hips, arms, shoulders, and head to generate force.
Move your shoulder upwards: When you’re jumping and turning with your entire body, make sure to move your shoulder upwards to gather momentum.
Body position: With your shoulder rotating towards your target, you would want to drive your torso in the upward direction as soon as you jump from your toes.
High chambering: The helicopter kick requires you to chamber higher than a normal jump spinning hook kick. Thus, lift your knees up higher and it’s achievable with that extra jump you took initially. Van Damme while performing this kick, lifted his knee in a crescent kick style to achieve a better split.
Put your chest away: An ideal helicopter kick involves pushing your chest away from the kick. While doing so, you want to move your non-kicking leg upwards and in an outward direction.
Bring the click down at a diagonal angle: Once you’ve chambered and about to land the kick, you want to bring it down at a diagonal angle.
Common Mistakes to avoid while doing a Helicopter kick
Kicking without a Jump: If you’re trying this fancy kick, you would want to do it as Van Damme did. He took an extra jump before executing the kick. Though it’s not helpful in combat, you really would want to do it right.
Trying without Static & Dynamic flexibility: Though there’s a myth that you need to have complete split before you attempt the kick, flexibility does make a difference. Most practitioners lack the static and dynamic flexibility which makes this showboating kick look extremely horrible.
Incorrect body movements: As seen in the image below, you want your entire body in sync as you’re rising from the ground. Look at the angles the body in moving towards in the image below. Most practitioners often scratch their heads and struggle to get the body movement right.
Not chambering high enough: As mentioned earlier, the helicopter kick requires a slightly higher chambering with your knees pointing outwards. High chambering position is important when you want to land your kick in the diagonal angle.
Not using your arms: The hand movement is crucial in a helicopter kick. You want to swing your hand along with your body to gather momentum and add additional power to your kick.
Countering a Helicopter Kick
A helicopter kick is not practically used in combat. It’s good for showboating but unlike other fancy kicks in this list, it’s not generally used in combat. However, if your opponent tries to attempt this kick for some weird reason, you can counter through the following steps:
Kick their back: An extra jump at the start is where you can sense what’s coming. That step isn’t generally used in other kicking techniques. Thus, as you see your opponent double bouncing. Simply kick their back before they can turn. You can use a roundhouse kick, a side kick or even a spinning hook kick for that matter.
Sweep while they bounce: When you compare the helicopter kick to other fancy kicks, it takes time to get started. Thus, you can counter before your opponent has even begun by sweeping the standing leg. We’ve seen this counter in numerous kicks above and it definitely works.
Side kick to the torso: If you’ve watched this clip where Van Damme breaks the pot, you’ll see that just as he is about to turn, his ribs are open. Though you have a millisecond, it’s enough to shatter your opponents’ rib with a side kick.
Please Note: Helicopter kick is a proper fancy kick and is usually used for demonstration purposes. It’s not really used in combat. If you just want to practice it then it’s great. However, don’t count it as an active move in your arsenal which you can deploy during actual combat. It’s just for showboating and demonstration purpose.
Drills to improve your Helicopter Kick
Sr. No
Drills
1
Learn to sync your head, arms, shoulders, and hips while you rotate
2
Practice hunching when you’re leaning backward in the air
3
Try achieving maximum height after you jump from the toes
4
Practice Diagonal angle kick with your body hunched forward
5
Perfect the Crescent kick chamber
Psycho Kick
Drawing resemblance to a flying side kick, Psycho kick is a spectacle on its own. Known in the popular culture as a signature move of Michael Jay White, Psycho kick is yet another fancy kick which is worth sharing with our readers.
Application of the Psycho Kick
Similar to the helicopter kick, the psycho kick is ideal for cinematic visuals and not in general combat. However, the deceiving nature of this kick makes it a lucrative one even if you wished to try it on your opponent. As opposed to the guyver kick and helicopter kick, Psycho kick can actually be utilized in a fight.
How to do a Psycho Kick?
Run-up: In contrast to other fancy kicks, a Psycho kick requires a run-up. You can see how Michael Jay White takes a few steps before actually delivering the kick. This run-up comprising of additional steps helps build a considerable amount of momentum before you directing your body upwards.
Kick in a diagonal angle: Once you take the flight, you drive your kicking leg across your opponent’s body in a diagonal direction. This is an aspect which makes this kick fascinating and capable enough to be used in actual combat. As soon as you drag your kick diagonal, your opponent cannot predict what’s coming their way.
Keep knee close to your chest: When you’re trying to achieve the diagonal angle, ensure that you keep the knees of your kicking leg as close to your chest as you can.
Move the other arm with your hips: While one arm is held in the upward direction, the other one moves to the direction you’re about to kick in along with your hips. This arm is more spread out and acts as a checkpoint to landing your kick.
Swing the kicking leg back: This is the step where you deceive your opponent. While he/she might be predicting that you’ll land your heel onto their face, you don’t. Instead, you circle the kick in front of their face, swing the leg back, chamber it and head towards the final blow.
Connecting with your opponent’s head: After having deceived your opponent, you can simply turn off his/her light through connection with your instep. If landed properly, this ought to be the killer blow.
Using the non-kicking leg to land: Unlike the other kicks, you need to use your non-kicking leg to land, which makes landing much easier as compared to those other fancy kicks.
Common mistakes to avoid when doing a Psycho Kick
Undermining the runup: It’s beyond my imagination, why a practitioner would cut short the additional steps before attempting a psycho kick. However, many practitioners make this common mistake. Undermining the runup results in less height, lower momentum, and torque. If you try to do this kick with a single step, you might find it fairly difficult to chamber your legs once you’ve kicked diagonally.
Not chambering before the kick: After successful deceit, you finally want to land the ultimate shot. However, most practitioners try to hit out straight away and do not chamber their legs. This often causes confusion and leads to kick being misplaced.
Not using instep or lower shin: While the first half looks as if you’re about to land your heels onto your opponent’s face. You don’t. Instead, you circle it back to chambering and then use your instep to land the final kick. If you end up using your heel in the first place as you kick diagonally, you would logically be unable to complete the kick.
Not stretching your arm outwards: Practitioners often commit a mistake by keeping the other arm close to their bodies. Yes, one arm is directed upwards but the other to open up in the other direction so you can gather the momentum as you circle your kick.
Kicking straight instead of going diagonal: Practitioners often commit the mistake of kicking straight instead of going diagonal. This not only takes away the surprise element but also takes away the effectiveness of this kick. Moreover, it makes way for an easy counter.
Countering a Psycho Kick
Closing the distance: A simple counter of a psycho kick would be by closing the distance as soon as you see your opponent measuring you. Before your opponent takes full flight, you want to cover the distance so you don’t leave any room for maneuvering.
Moving backward: If you have space behind you, try taking a step back. It’s the best defense you can do. However, you need to get the timing right in this one. It takes less than a second for the kick to come your way. Thus, increase the distance as soon as you see your opponent taking a run-up.
Ducking down: A popular technique in protecting yourself from these fancy kicks. Ducking down is not as safe as moving back since the chambering leg allows your opponent to adjust his/her target. However, with perfect timing, you can deceive your opponent too.
Skipping Roundhouse kick: Yet another fancy kick which can be countered by a skipping roundhouse kick. When your opponent circles his/her leg after they have kicked diagonally, they leave their ribs open. You can capitalize on this opening and land a skipping roundhouse kick which can end the contest.
Using front kick: Similar to the roundhouse kick, you can obstruct your opponent’s effort with a front kick. By skipping a step and delivering a front kick, you’ll not only prevent your opponent from chambering the legs but might also land a decisive kick.
Drills to improve your Psycho Kick
Sr. No
Drills
1
Practice flying side kick and roundhouse kick to good measure
2
Try stretching your leg in the upward direction as much as you can
3
Practice the diagonal kick followed by a hip movement mid-air but don’t land the kick
4
Try improving your hangtime in the air using a mat
5
Practice the kicking motions while you’re on the ground
Feilong Kick
Stemming from the same person who introduced the Guyver kick in the popular culture, the Feilong kick is yet another impressive ammunition in Boyka’s arsenal as seen in Undisputed 2. The Feilong Kick or the Front Feilong Kick is quite similar to the Guyver kick.
Application of the Feilong Kick
This kick is quite helpful to open the guard with the first kick and land the blow on the open area with the second one. To perform a Feilong kick, you need to master the jump spin hook kick or a jump spin crescent kick. To simplify, you need to learn to kick and land on the same foot.
How to do a Feilong Kick?
Step in: From your normal stance, you would want to step in just as Boyka does for better height and momentum.
Turn your entire body: Similar to the helicopter kick, when you spin, you want to involve your entire body including your head, shoulder, arms hips, and legs before you raise your kicking leg.
Driving shoulder upwards: Though presented as a different step, this movement should happen simultaneously with your body movement. Herein, you should drive your shoulder and hips in the upward direction to achieve more height.
Lift your leg in the chamber position: Once you’ve rotated your body and have your opponent in sight, chamber your kicking leg. When you’re in the chamber position, make sure you lean backwards while you’re hunching to counterbalance your weight. This helps you to implement your first kick while setting up your second.
Tuck your other leg inwards: While you’re lifting your first leg and moving it diagonally, your kicking leg should be tucked in. As soon as your first leg is about to touch the floor, use the kicking leg to land your front kick with impact.
Setting up the kicks: The first kick looks like a crescent kick which you need to land mid-air before setting up your second kick. i.e. front kick or kick to the chest or guard. Though you can use a hook kick instead of a crescent kick, the set-up won’t be much smoother and will make the task on hand difficult.
Diagonal kicking motion: The first kick should flow diagonally from the center line to help keep the shoulder as square as possible to the front to achieve better rotation. A correct movement will perfectly set up your front kick to the chest and will help add more impact.
Push the hips forward: Just before landing your second kick i.e. the front kick, you want to Plant your kick with the entire momentum of your hips directing forward. This will enable you to achieve a clean front or push kick depending upon how you hit it.
Proper landing: The landing will be on the foot you attempted your first kick with. It will be the simplest task in the execution of this technique. Your second kick will follow shortly and you will get back into the fighting stance.
Common mistakes while doing a Feilong Kick
Improper body movement: You want your entire body to move in sync. Your head, hands, shoulders, and hips should move together. Practitioners who are starting out often end up moving the arms in the opposite direction which takes the power and momentum away from the kick.
Compromising the stepping movements: Just as you’re about to take off. Take as many steps as possible to set up a higher takeoff. Do not comprise on the steps you take as it will obstruct the height you achieve. Furthermore, if you don’t rise higher, it’ll be fairly difficult to land both the kicks.
Not moving the leg inwards: Just as you’re about to move your legs diagonally, you want to move your front kicking leg inwards before you do the final kick. If you don’t tuck your legs, you’ll be clueless with the second kick and the entire effort will amount to nothing.
Not chambering: We can talk about chambering all day and the lack of it being the most common mistake made by the practitioners. If you read any kicking blog with chambering in it, you know the amount of flexibility is target resetting opportunities that it provides.
Cheating the angle: When attempting a Feilong kick, don’t cheat the angle. You must make sure that your kick is flowing through the center line and your shoulders are as squared as possible. An improper diagonal motion will directly impact the precision and effectiveness of your second kick.
Countering Feilong Kick
Duck under the first kick: This counter is high risk, high rewards. Technically when your opponent is Feilong kicking, you might feel that his/her heel might land on your head. However, that’s not the case. Your opponent will try to move their legs diagonally around the center line, which leaves their entire body exposed. You can use this moment to land a front kick of your own.
Attack your opponent’s back: Similar to other spinning kicks, you have a fraction of a second where you can attack and derail your opponent. The best solutio, in this case, would be to launch a jumping side kick while your opponent has his/her back turned towards you.
Take a step back: The major goal of the Feilong kick is to land the second kick i.e. front of push kick to great effect. However, you can simply duck the first one and step back as soon as your opponent is trying to land the second one. If you do that, you’ll effectively disbalance your opponent and can land a counter of your own.
Using Basic Counters & Feints: As mentioned above, you can also choose to close in on your opponent or step back to nullify the entire effort. Doing so will present you with an opening as your opponent will be looking to recollect himself.
Drills to improve your Feilong Kick
Sr. No
Drills
1
Practice the hyper jump spin hook/crescent kick first
2
Practice diagonal kicks whilst you rotate
3
Try tucking in the back leg while trying a jumping kick
4
Try activating both the legs in the air. Use a mat or a soft surface to land on
5
Practice Front kick to good effect so the end result is impactful
L-Kick or Au Batido
L-Kick is a fancy kick which you might have seen fighters use in an MMA combat. It’s quite popular in Capoeira and you won’t see much of it in Taekwondo, Karate or other Asian styles. Though it mostly represents showboating, it can sometimes be effective in setting up your next move.
Application of the L-Kick
The L-Kick is most used to target the torso or the chest region of your opponent. With the help of your arm, you try to use the opposite leg to attack. Before you practice L-Kick, you must develop handstand and cartwheel techniques. This will allow you to deliver this kick effectively as you will have much more control over your legs and how to use them.
How to do an L-Kick?
Step-forward: Taking a step forward acts as the basis of an L-Kick. For this purpose, you must be slightly distant from your opponent. However, the distance shouldn’t be too much. As you want your opponent to be in your kicking range.
Use a hand for support: Just like your use your hand in cartwheel to support your body, you use one hand to support your entire movement. Make sure that that you’re kicking with your favorable leg and your hand has enough strength into to hold your weight.
Swimming your kicking leg: As you place your hand onto the ground, extend your kicking leg by bringing your hips over to the other side. Your front leg would be completely horizontal whereas your trailing leg would ideally be completely vertical in the air. However, you can experiment with the trailing leg, you can also fold it if you want.
Counterbalance your body weight: While you’re trying to extend your kicking leg, do not exert all the weight onto your hand. You want to transfer the weight to the trailing leg so you maintain the balance.
Use the ball of your foot: As you swing your leg to the other side, your ball of the foot should be connecting with your target.
Fall back into natural fighting stance: Once you have executed the kick, you should fall back into the position you started at. You must not roll over to the other side as it will create problems. You would either lose your balance or might injure your hand in the process.
Common mistakes to avoid when doing an L-Kick
Lack of control over the limbs: Just because you can handstand does not mean you will be able to deliver the kick. Thus, make sure that you’re able to gauge your legs in the right direction. Having control over your limbs and its movement is crucial in landing an L-kick.
Exerting too much pressure: When swinging, do no exert to much pressure on one side. You must counterbalance your weight. If you exert too much pressure or apply extra force, you might end up tripping or twisting your hand.
Not stretching the leg enough: The reason why trainers emphasize on handstand and cartwheel is to maximize the stretching and control. If you take short roads and do not stretch your kicking leg vertically, you might miss your target and in the worst-case scenario, suffer from a botched landing.
Swinging the leg too hard: Similar to exerting pressure, if you swing your leg too hard, you won’t be able to counterbalance your weight and might trip over.
Using the wrong part of the foot: Finally, the most common mistake lies in using the wrong part of your foot i.e. not using the ball of your foot. Avoid using your shin or the blade of your foot when doing an L-Kick.
Countering an L-Kick
Due to its unique motion, the L-kick doesn’t really present with an opening. In such a case, stepping back or closing the gap is the best way to defend yourself against the kick. If you happen to kick through your opponent’s body at the right time, that might knock him out and cause a terrible impact on his/her ribs. Based upon your preference, you can either get into a defensive block followed by a counter or you can directly deploy an attacking counter which might score a knockout.
Drills to improve your L-Kick
Sr. No
Drills
1
Practice cartwheel and handstand to great effect
2
Try holding your body in the cartwheel position for about 5-10 second, to begin with
3
Progress by using one hand only instead of two, use the other one along with kicking
4
Learn to balance your body weight on your hands
5
Do hand drills to improve your shoulders, forearms and other muscles to its capacity
The Showtime Kick
Showtime kick derives its name from MMA legend Anthony ‘Showtime’ Pettis. In his own words, “Anybody can do a showtime kick, you don’t need to be really athletic, you just need to practice setting up”. As Anthony once explained during a demonstration, ‘All his kicks are a part of a perfect setup’ and showtime kick is no different.
Application of a Showtime Kick
The Showtime kick is a pure MMA kick as it requires using the cage to set up the kick. It can be used effectively to target the opponent’s head with the extra force generated through height. The showtime kick isn’t a standalone kick, it is a follow-up kick, generally deployed after a fake inside kick.
How to Showtime kick like Anthony Pettis?
Get your opponent close to the cage: Since you want to use the cage as the tool to rise and deliver the kick, you want your opponent to be really close to the cage so you don’t miss your target.
Setting up with a push or inside kick: You must leave your opponent on the back foot with a push kick or an inside kick. While they’re trying to recover, you can attempt a fake inside kick and quickly deliver the showtime kick.
Take a step forward while faking the inside kick: A key step towards delivering the showtime kick is the extra step conceal in your fake inside kick.
Jump off and turn your hips: Once you take a step forward, you want to jump off and turn your hips so you can land the kick effectively. While doing so, try making the utmost use of your body momentum. Put your body behind the move and don’t detract the force in the opposite direction.
Land the kick with your shin: When landing the kick, make sure to use your shin. Part of what makes the Showtime kick special is the impact along with the unpredictability. Since your opponent is expecting a straight kick and easily block it. Using the cage as a prop provides with additional height and impact.
Common mistakes while doing a showtime kick
Being too distant from the opponent: The prerequisite of this kick is to stay within a kicking range from your opponent.
Not wrapping an extra step: As mentioned above, you want to take a step forward before you go complete Ninja.
Not creating enough momentum: To land an effective showtime kick, you want to create enough momentum. For this reason, you should coordinate your hips along with the movement to generate more power.
Not achieving enough height: Anthony Pettis generally targets his opponent’s chin or neck. Thus, you should use the cage to gain elevation based upon the height of your opponent. A failed attempt will lead to miskick or disbalance which can prove to be costly.
Countering the showtime kick
You don’t want to end up like Benson Henderson suffering from a nightmare. Thus, you’d better want to defend or counter against the kick. There are several ways to defend yourself or perhaps counter the kick.
Note the movement: Unless it’s Showtime Pettis himself, you can rest assured that your opponent is very unlikely to use this technique. However, to be on the safe side, look out for that fake step followed by the fake inside kick.
Catch your opponent mid-air: It took less than a second for Pettis to catch Henderson. Thus, the room to maneuver is very less. You have to be lightning quick and catch your opponent as you see them stepping onto the cage.
Fall back: A defensive awareness can help you avoid the move altogether. Yet again, you need to be extremely quick. As you see the kick coming your way, simply take a step back. If your opponent loses his footing, there lies an opening for you to crack on him with your combinations.
Drills to improve your Showtime Kick:
Sr. No
Drills
1
Understand the dynamics of the location you’re in and how you can use the objects around as props
2
Practice chambering before you’re about to kick
3
Do ballistic stretches
4
Trying improving your kicking technique with your shin
5
Try the movement without kicking by just opening your hips using the walls
Criticism surrounding Fancy Kicks
Martial art practitioners often criticize how these fancy kicks are of no good in actual combat. But what’s fancy to one might be the same to another. Depending upon the situation, you can use these kicks to a great effect. Your kicks can be effective and fancy at the same time given you know how and when to use them.
While you might hear “Only good for the screen” quite often, some of these moves are good enough for self-defense. Moreover, if you’re looking to demonstrate your skills to someone, they might come off as really handy techniques. Thus, the criticism is not really just since these kicks are relevant and can be applied in certain areas.
Improving Dynamic Flexibility for Fancy Kicks
To perform any of these kicks, your dynamic and static flexibility has to be on point. When it comes to fancy kicks, you need to have static flexibility, without which you cannot go forward. You can do the following exercise to improve your dynamic and static flexibility so to be able to execute fancy kicks:
Front Leg Raise: You should do this exercise with each leg (5-10 times each leg)
Side Leg Raise: You can do this exercise using your hand as a target and kicking with each leg (5-10 times each)
Back Leg Raise: With the support of the wall, you should try raising both your legs in the backward direction as high as possible (5-10 times each leg)
Outward/Inward Crescent kick: Crescent kick helps to improve the range of your kicks and improve the overall flexibility. Try both inward and outward crescent kick (5-10 times each leg)
Outward/Inward Downward kick: These kicks will help improve the range along with working your hamstring thereby allowing a better hip flexibility
Wall Front Kick: If you’re just starting out, try the front kick by supporting your back on the wall and holding your kick in the air for 5 seconds (5-10 times each leg)
Wall Side kick: Another exercise to open up your hips and improve control over the lips. Place your hand against the wall and try holding the side kick position for 5-10 seconds (5-10 times each leg)
Wall Side Kick Wave: Similar to the side kick, however, this drill requires you to move your leg up and down in quick motion
Kick Circles: Practice kick circles a sit will work your entire leg and will help you transition to other kicks. Hold onto the position for 45-60 seconds with each leg
Turning Kick with a partner: Holding your partner’s hand, try targeting the right areas. The goal of this drill is to learn to gauge your legs towards the right target. (5-10 seconds in each section)
Figure 8: Figure 8 will help improve the range of motion in your hips. A factor quite crucial when wanting to deliver these fancy kicks. Try this exercise for 45-60 seconds with each leg for up to 5 times
I hope you found this all-inclusive fancy kick guide helpful. I tried to cover as many kicks are possible and discuss them at length so you don’t miss out on them. Regardless of what anyone says, keep practicing these kicks, you never know when they might turn out to be a handy addition to your arsenal!
If you like to read such informative guides, and want to learn about more kicking techniques, choose from the topics below: